演習1.9 サブページ(koinu.html)の作成
- これまでに学んだ内容
続いて、2つ目のサブページを作成していきます。前節の「子猫の部屋」と同様に、サンプルソースの内容をコピーして、そのまま使用してください。
では、2つ目のサブページ(koinu.html)を作成していきましょう。
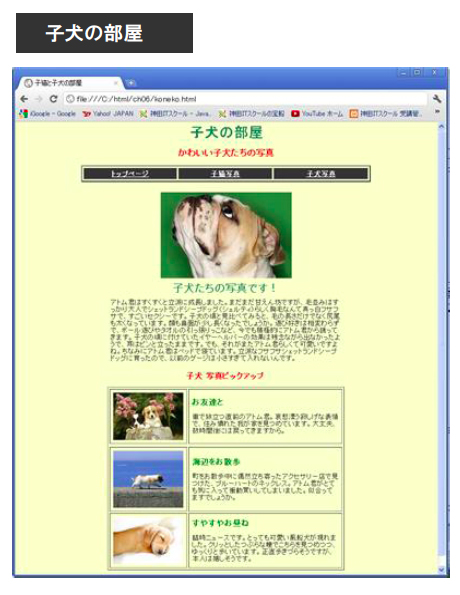
図 1.9.1 サブページ(koinu.html)
1. サブページ「koinu.html」を作成してHTMLファイルを保存
2つ目のサブページは、「子犬の部屋」というページです。さきほどは子猫たちを紹介しましたが、今回は、かわいい子犬たちを紹介します。新しくメモ帳を開いて、[koinu.html]という名前で、[ch06]フォルダ(これまで作成してきた[index.html]や[koneko.html]と同じ場所)に保存してください。
文字コードは、前回同様に、UTF-8としましょう。
2. HTMLファイルにソースコードを記述
今作成したHTMLファイルに、以下のURLにあるサンプルソースをコピーして、メモ帳に貼り付けしてください。
https://kanda-it-school-square.com/sample-list/htmlcss/
「子犬の部屋のサンプルソース」
①ソース・フォルダー :html/ch06
②ファイル名 :koinu.html
➢ koinu.html
<!DOCTYPE html>
<html>
    <head>
        <meta http-equiv="Content-Type" content="text/html; charset=UTF-8">
        <title>子猫と子犬の部屋</title>
    </head>
    <body style="background-color:#FFFFCC; text-align:center;">
        <h1 style="color:#2A7E55;">子犬の部屋</h1>
        <h3 style="color:red;">かわいい子犬たちの写真</h3>

        ~中略~

        <hr style="width:540px;">
    </body>
</html>
3. HTMLファイルを上書き保存してブラウザで表示
サンプルソースをメモ帳へ貼り付けたら、ブラウザで確認してみましょう。図1.9.1の画像のようなページが表示されればOKです。

